
One of the first photos I took while travelling
Photography can be as simple as just pressing the shutter button for some but it can be more than just that. In this guide, i'll be giving you 10 tips on how to better document your travels through photos. Some of these tips will also be useful for general landscape photography. Note that while you don’t need a DSLR camera to take good photos, a camera with a "manual" setting would definitely help you get the photos that you want. I'll try to make this guide as beginner friendly as possible. Emphasis on try. (If you don't see all 10 tips, click on "continue reading")
1.) Avoid white skies if possible:
A picture with a white featureless sky usually looks unattractive, especially
if you have a detailed foreground. To bring out more details in the sky, you'd usually have to lower the exposure of the entire image (make it darker). This can be done in a number of ways but the simplest way is by
lowering the exposure compensation of your camera (check your camera’s manual
for the instructions on how to do this) The goal is to get the exposure just
right so that you’d get enough details in the sky without making the ground
look too dark. If you have people in the picture, you’d want to expose for the
sky and use your flash to illuminate the people. Note that the flash is useless
for illuminating things that are too far away from you. Don’t expect it to make
an entire mountain range look brighter. If either the sky ends up being
overexposed or the ground ends up being underexposed, as a last resort, you can
use an editing program like photoshop to either brighten up the ground or
darken the sky. Try doing research on HDR editing as well. If it really can't be avoided and you don't like editing so much, just fill the frame with the ground or try to hide the sky behind foliage. If you’re more serious
about photography, consider getting graduated density filters. These will allow you to darken just a part of the image
such as the sky while leaving the rest of the image unaffected.

A very uninteresting photo. The white featureless sky is so barren
compared to the mountain range below that it looks like one half of the photo
is missing. This photo was actually taken at sunrise but it was so overexposed
that the sky just looked white and the clouds are not visible
.JPG)
2. )Use your flash:
Most people think that the flash is only useful when there’s not enough
light in a scene. But there are more uses to the flash than just making a dark
picture brighter. Using your camera mounted flash under
direct sunlight will soften up shadows and it can actually make your subject’s
skin look smoother because it eliminates or softens up the shadows created by facial
imperfections. In photography jargon, it’s called “fill light”. Note that the flash only acts as a fill light if there's another light source that's stronger than it, such as the sun. Usually it’s
possible to adjust the power of the flash. The ideal amount is when some
shadows are still visible but they’re very soft. By using your flash, you can also
adjust the exposure of the background independently from the subject. You can bring
out more details in the background by making it darker without making your
subject look darker as well. It also freezes motion so if you’re subject is
moving, motion blur can be minimized or eliminated. One downside of using a camera
mounted flash is that it will practically remove all drama in a scene by
removing the shadows. By using an external flash though and positioning it at an angle to the subject, you can create very dramatic shadows (subject for another entry)

This photo was actually taken with a flash but the camera was too far
away for it to be effective (it was on the other side of the road). As a
result, the shadows on our faces are clearly visible

This photo was taken with a flash but the camera was much closer. As a
result, there are no harsh shadows on our faces even if the sun was at a very sharp angle to us. We also stand out against the background
better making the picture look sharper.
3.) Minimize flare:
Flare is caused by unwanted rays of light hitting your lens. You usually wouldn't know how much contrast you’re losing from flare until you put your
hand over the lens and see how much the contrast improves. If you have a DSLR,
try using a lens hood (yes, they’re not just for show). If you don’t have one,
try using your hand to shield the lens from the light the way Hillary Clinton
is doing in the picture below

Hillary Clinton, either measuring her own height with her hand or
showing us how to improve image quality by shielding your optics from flare.
Photo’s not mine of course. Credit goes to the intornets
4.) Increase your
depth of field: (warning possibly confusing analogy ahead) I’d like to
think of depth of field as an imaginary wall that runs perpendicularly to the
lens of your camera. Everything outside this imaginary wall would be blurred
and everything inside it would be sharp. If the wall is thick, your depth of
field is deep; If it’s thin, your depth of field is shallow. I’m not sure if I was
successful in my attempt to make your brain explode but I tried my best. For
the sake of simplicity, let’s just say that it’s the blurriness or sharpness of
the background. A shallow depth of field
(blurred background/foreground) looks good for portraits but if you’re travelling
you'd probably want the place to be in the spotlight as well as the people so
you’d want everything to be as sharp as possible. You can adjust the depth of
field by adjusting the aperture and also by “zooming in”. Use a smaller
aperture (The higher the number, the smaller the aperture) to increase the
depth of field. Try to set your aperture to f11 or higher and adjust the other settings
accordingly. If you have a point and shoot, just set it to landscape mode.
 While this is not exactly a snapshot, it’s a fine example of why you’d
want a photo with a deep depth of field. You can see how focused everything is
from the rocks in the foreground to the farthest ripple in the ocean.
Equipment: Sigma 24-70mm f2.8, one 580ex off-camera. Settings: 1/250, f13, ISO 100
While this is not exactly a snapshot, it’s a fine example of why you’d
want a photo with a deep depth of field. You can see how focused everything is
from the rocks in the foreground to the farthest ripple in the ocean.
Equipment: Sigma 24-70mm f2.8, one 580ex off-camera. Settings: 1/250, f13, ISO 100
Again, not a snapshot but a fine example of a photo with a shallow
depth of field. The background is completely blurred and the subject is sharp.
Equipment: canon 70-200mm f2.8, one 580ex flash mounted off camera. Settings:
1/125, F2.8, ISO-100

6.) Try different
angles. The general rule is if you crouch down and you point the camera upwards, you make a person’s legs
look longer and head look smaller and if you stand up, the opposite happens. You
can increase this effect by using a wider lens or by getting closer to the
subject. The sweet spot would be somewhere near the middle. Try squatting when
taking photos of people or getting down on your knees depending on the
proportions of the person you’re taking pictures of. This technique is not only applicable to people, it can also be used on trees, cliffs, rivers etc. Whichever part of the subject is closer to the camera will look longer/bigger

Here’s an example of using perspective to exaggerate the
proportions of your subject. I used an ultra wide angle lens, I crouched down
and pointed the camera upwards. The result: the model’s legs look especially
long
7.) Experiment with the
shutter speed. Shutter
speed controls the amount of time that your sensor is exposed to
light. Motion would cause blurring in a photo if you have a low shutter speed. Using a higher shutter speed would minimize or
eliminate this blurring effect. If you have a tripod, you can use slow shutter
speeds to create beautiful images of running water. You can use a fast shutter
speed to take sharp photos of jump shots, people running on the beach or water
splashing against rocks. You can also use
a slow shutter speed so you’d have motion blur in the background and then use
your flash to make your subject look sharp. (the flash freezes motion, as
I mentioned before.) One question that beginners usually ask is "what settings should I use" There is not always a straight answer to that. Photography is a matter of trial and error, a lot of times. Usually photographers would take a lot of test shots before they arrive at the settings that they want.
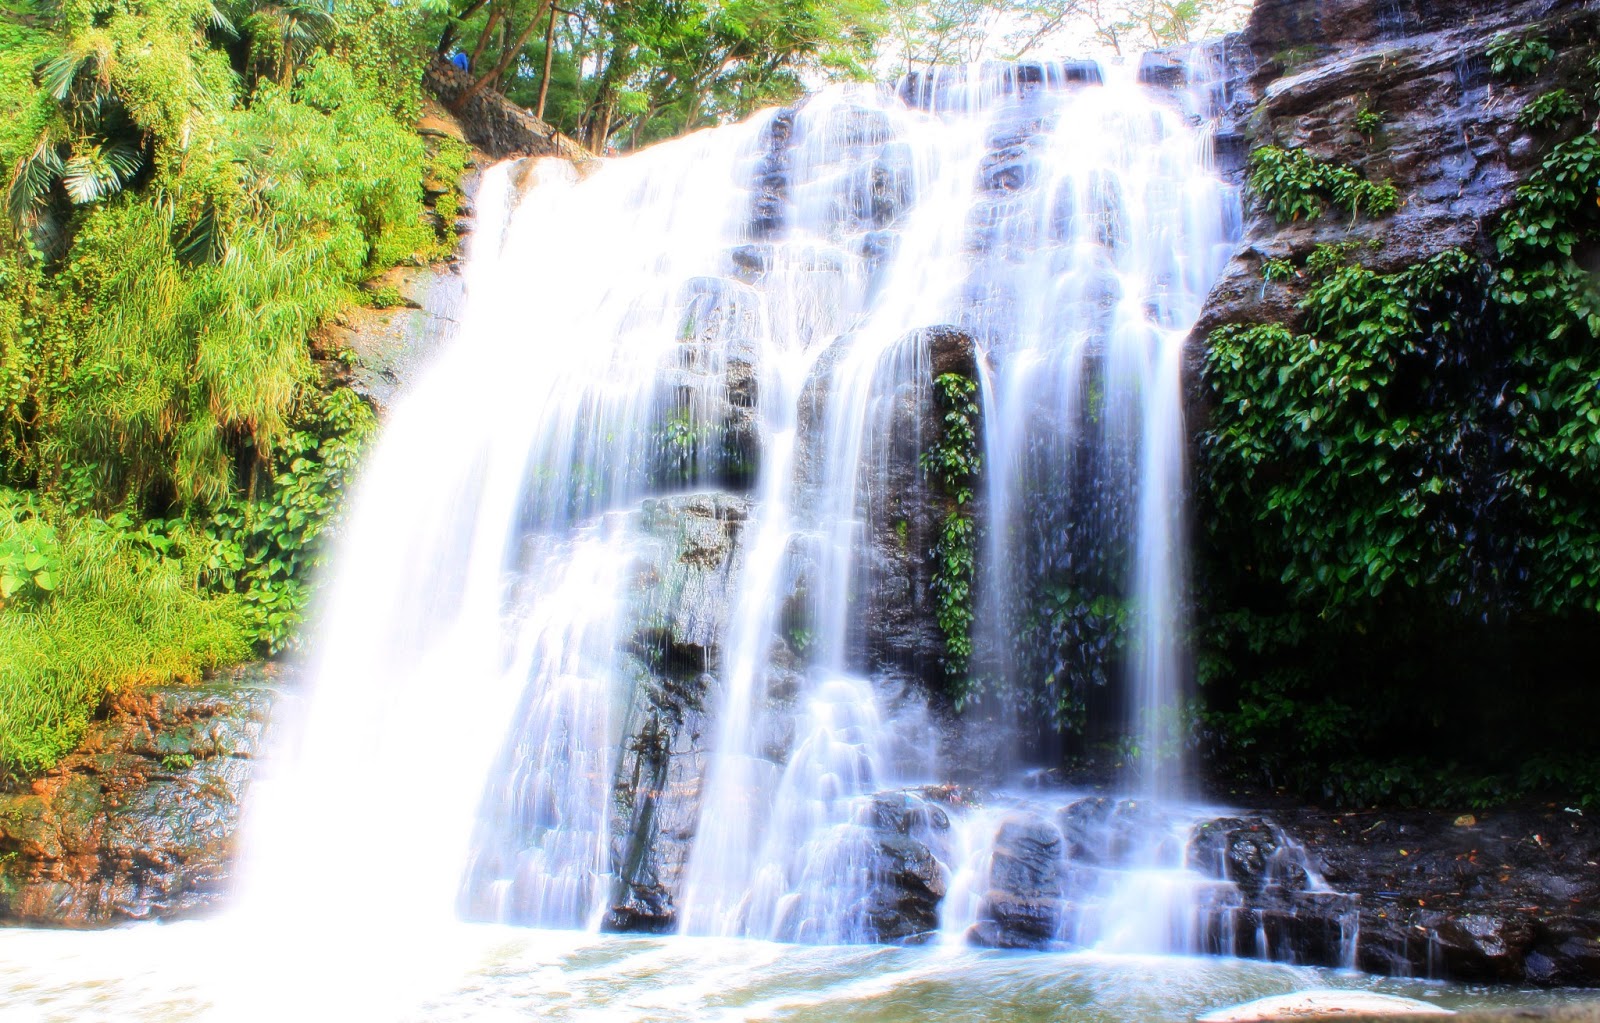
Even at a shutter speed of just 1/2 of a second, there's already a lot of motion blur in this photo
8.) If you have a canon
DSLR, install Magic Lantern!! This one’s for the more advanced photographer/videographer.
It’s a program that you install on your
memory card that adds functions to your camera like timelapse, HDR, manual audio
controls, programmable rack focus, more frame rates, higher bit rates, zebra
pattern and so much more. Based on the amount of functionality that it adds to
your camera, it should be worth thousands of dollars. The fact that it’s free
just makes it an absolute must to have. As of the moment, it only supports the
canon 5Dmk2, 50D, 60D, 500D, 550D, 600D but support for future models should be
available in the future. http://www.magiclantern.fm/
9.)Pack accordingly.When hiking, weight is an important consideration. It’s probably not wise to bring your 70-200mm f2.8 even if you have a porter with you, unless you also have a lighter camera with a lighter lens. You’d want to be able to put your camera in your bag quickly if you need both hands and take it out quickly if you wanna take a shot. You won’t be able to do that with a big lens and you’ll just miss out on a lot of nice shots. If you’re gonna bring a heavy lens, make sure that you also have one lightweight lens with you. If you’re gonna be hiking, bringing a compact camera along with your DSLR might be a good idea.

This is all that I bring with me when I hike. A canonI 600D and an 18-55mm kit lens. I also had a tripod in this picture but I regretted bringing it. I was tempted to leave it among the rocks at one point.Photo grabbed from Julie.


10.) Tell a story using
your photos: Sometimes it’s not just
about taking beautiful images. Travel photography is sometimes also about what
you did, what made the trip special for you. A picture of you holding chopsticks may not be meaningful to everyone but if it was your first time to use them, it would be meaningful to you.The story doesn't even have to be about you. It could be about the people you see around you. If you see something that triggers a thought in you, take a picture of it and then maybe write about it later if you have a blog or a travel journal.You
don’t always have to follow the rules of composition. There really are none,
only guidelines. When you take too much time setting up a shot, you end up losing the moment and that spoils that travel aspect of your travel photography. The photo below was completely unstaged. It was a random couple sitting under the shade and looking out towards the horizon. They were there for just a few minutes. If i had been a little bit late, i would've missed the shot. People are drawn to photography for a variety of reasons. For me, one of its more personal uses is capturing brief moments before they pass by completely

A picture of me holding chopsticks
That ends my little guide. Happy clicking
No comments:
Post a Comment