Monday, April 6, 2015

Pinto art museum

When people think of summer getaways, they usually think of beaches, places where people go out to have fun. But there are people who prefer quieter alternatives to those places. For those people, there's the Pinto art museum, a 1.2 hectare property inside a private subdivision in Antipolo.This was supposed to be the first stop among many in our itinerary. We realized that it was gonna be a full day affair when after walking around for 4.5 hours in the museum, we still had not explored it fully.
The art museum, where you pay the entrance fee of 180 pesos


The artwork is everywhere, inside the galleries also in the museum's many gardens

All the while I was calling it the “pintow” museum. Apparently it’s pinto –as in door in Filipino. Must've sounded like a male Kris Aquino. Unlike most museums, photography here is allowed. Also, unlike most museums or galleries which are mere vessels for the artwork displayed within them, the Pinto museum integrates so well with its art that it's sometimes hard to tell where the artwork ends and the museum begins. The gardens make you feel as if you fell into a rabbit hole; Sculptures are everywhere, inside and outside the galleries. The placement of furniture has a surrealist feel. There are rocking chairs with hands on the handrests in the gardens; Beds with impossibly white sheets are everywhere they shouldn’t be-in the gardens, next to the pool, in the cafe. (I think it’s pretty awesome that you can lie down on them while ordering your food. ) It’s as though the entire museum itself is extension of the art that's on display. It seemed like the idea was not just to view art but be immersed in it.


beds are everywhere
A sculpture of a naked couple lying on the grass. Oh and there's also a bed on the far end of the pool

A couple lying on a bed while ordering food. Not a sight you see everyday

After paying the 180-peso entrance fee, you’ll be given a map which will come in handy because there really is a lot to explore. The pinto museum has multiple galleries, gardens and a lot of open areas in between them. When you're not busy checking out the artwork, there are plenty of places to lounge around. There’s a pool but as you might expect, you can't swim in it. There are two cafes. We tried ordering food and drinks at the Ta-naw cafĂ©. Food was a bit on the expensive side. The minimum cost of a dish was somewhere in the vicinity of 300 pesos. I'd write about how the food was but it took them 20 mins to tell us that the food that we ordered was not available. Rather than wait another 20 mins to find out if our next order would be available, we just paid for our drinks and decided to eat outside. The mango shake was good though.

The Tanaw cafe

The other cafe which we didn't get to visit


The Pinto museum would definitely appeal to the art lover but I think it would also appeal to those who are looking for a quiet place where they can unwind, relax and just be away for a while while enjoying the aesthetics of their surroundings. A place that’s not too far away from the city but also not too close. Since most people who go there are probably also after some tranquil time, you can expect some peace and quiet even if there are people around.

Entrance is 180 per head for adults, 150 for senior citizens and 100 for students
7500 for photoshoots
The Pinto art museum is only open until 6pm

More photos after the break

Saturday, March 23, 2013

Mt. Pamitinan, Montalban Rizal

Mt Pamitinan: Not the highest mountain in the Philippines but far from the most forgiving
This was not the initial destination that we had in mind. We were supposed to go to Mt Romelo but then Kenji's GPS led us to a section of road that was unpaved. My car was so low that it could only negotiate paved roads. The bottom scraped pretty badly on one section of the road. And then for the first time since I've had him, Xander overheated. Upon closer inspection, his auxilliary fan gave out. That would've been ok if the sun wasn't in full scorch mode but on that day, you probably could've cooked an egg if you left it on the ground. Looking for alternate routes and waiting for the car to cool down ate a lot of time. Since it was already geting late, we decided to go to wawa instead which was closer (less than 2 hours away from manila).
 
Xander is usually a pretty reliable car but this was not his finest moment

This is the most difficult hike/climb i've done in my still very short stint as an outdoorsy person. Climbing the steep jagged rocks was actually the easy part. My rock climbing skills were quite sufficient for the climb. The difficult part, at least for me, was walking for more than an hour on a trail that consisted of nothing but inclines. There was no level ground at all. It was uphill all the way. If you're as heavy as I am, stamina's gonna dwindle very quickly. The entire climb lasted about 2-3 hours. (We had a lot of breaks. If you have more stamina, you can probably do it a lot faster)

 
During the start of the hike, I had to make more than a few stops to catch my breath. I was beginning to doubt if i was gonna make it to the top. At one point, fredda said "If it's too difficult for you, you don't have to go". My heart felt like it was gonna jump out of my chest but there was no way that i was gonna show her that I was weak. So I soldiered on for the preservation of my manly dignity. I got the hang of it eventually and it got progressively easier for me even if the trail actually got harder. (tip: if you're gonna scale this mountain, I would advice you to bring gloves and footwear with thick soles since the rocks are pretty jagged)


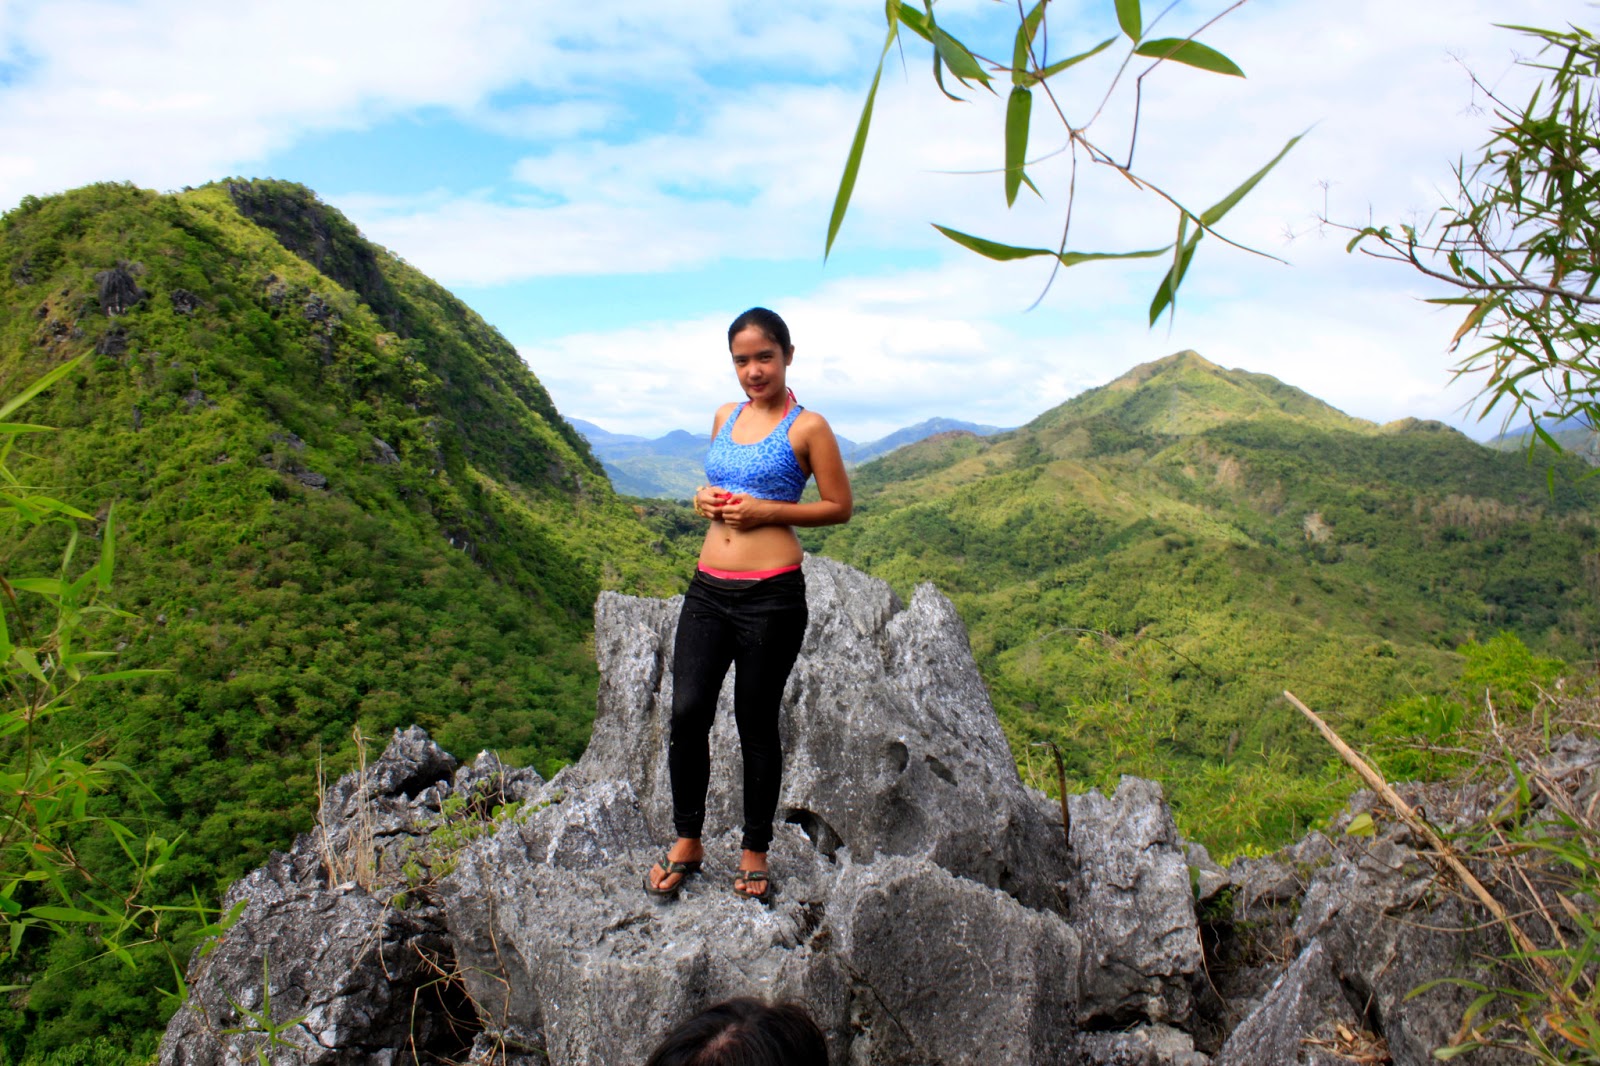
Group shot at the summit

In my previous hikes, I used to handle my own camera. I wanted to be able to take pictures whenever I wanted to. The downside of that is that I wasn't usually in the pictures that I took. This time I let Manong tour guide handle the camera almost the entire time. I have a lot more photos this time. This makes me happy. Not because i'm vain. But because (warning:very deep justification ahead) by looking at the pictures, it makes me realize how intimate I've become with nature. From a person who's never left the city just 2 months ago to someone who scales jagged rocks and wades through thick foliage with relative ease... ok it's also nice to have nice pictures

 
Alexander, conqueror of mountains. Mancode entry #2052: One must not climb a mountain without having at least one heroic picture of yourself

Monday, March 4, 2013

Basic guide to travel/landscape photography

One of the first photos I took while travelling

Photography can be as simple as just pressing the shutter button for some but it can be more than just that. In this guide, i'll be giving you 10 tips on how to better document your travels through photos. Some of these tips will also be useful for general landscape photography. Note that while you don’t need a DSLR camera to take good photos, a camera with a "manual" setting would definitely help you get the photos that you want. I'll try to make this guide as beginner friendly as possible. Emphasis on try. (If you don't see all 10 tips, click on "continue reading")
 
1.) Avoid white skies if possible: A picture with a white featureless sky usually looks unattractive, especially if you have a detailed foreground. To bring out more details in the sky, you'd usually have to lower the exposure of the entire image (make it darker).  This can be done in a number of ways but the simplest way is by lowering the exposure compensation of your camera (check your camera’s manual for the instructions on how to do this) The goal is to get the exposure just right so that you’d get enough details in the sky without making the ground look too dark. If you have people in the picture, you’d want to expose for the sky and use your flash to illuminate the people. Note that the flash is useless for illuminating things that are too far away from you. Don’t expect it to make an entire mountain range look brighter. If either the sky ends up being overexposed or the ground ends up being underexposed, as a last resort, you can use an editing program like photoshop to either brighten up the ground or darken the sky. Try doing research on HDR editing as well. If it really can't be avoided and you don't like editing so much, just fill the frame with the ground or try to hide the sky behind foliage. If you’re more serious about photography, consider getting graduated density filters. These will allow you to darken just a part of the image such as the sky while leaving the rest of the image unaffected.


A very uninteresting photo. The white featureless sky is so barren compared to the mountain range below that it looks like one half of the photo is missing. This photo was actually taken at sunrise but it was so overexposed that the sky just looked white and the clouds are not visible


 I adjusted the exposure so every cloud in the sky would be visible. As a consequence, the ground looks a bit dark (the trees are just silhouettes). I compensated for this by using my flash to illuminate my subject, the street signs, and making the sky occupy more of the frame.


2. )Use your flash: Most people think that the flash is only useful when there’s not enough light in a scene. But there are more uses to the flash than just making a dark picture brighter. Using your camera mounted flash under direct sunlight will soften up shadows and it can actually make your subject’s skin look smoother because it eliminates or softens up the shadows created by facial imperfections. In photography jargon, it’s called “fill light”. Note that the flash only acts as a fill light if there's another light source that's stronger than it, such as the sun. Usually it’s possible to adjust the power of the flash. The ideal amount is when some shadows are still visible but they’re very soft. By using your flash, you can also adjust the exposure of the background independently from the subject. You can bring out more details in the background by making it darker without making your subject look darker as well. It also freezes motion so if you’re subject is moving, motion blur can be minimized or eliminated. One downside of using a camera mounted flash is that it will practically remove all drama in a scene by removing the shadows. By using an external flash though and positioning it at an angle to the subject, you can create very dramatic shadows (subject for another entry)

This photo was actually taken with a flash but the camera was too far away for it to be effective (it was on the other side of the road). As a result, the shadows on our faces are clearly visible


This photo was taken with a flash but the camera was much closer. As a result, there are no harsh shadows on our faces even if the sun was at a very sharp angle to us. We also stand out against the background better making the picture look sharper.

3.) Minimize flare: Flare is caused by unwanted rays of light hitting your lens. You usually wouldn't know how much contrast you’re losing from flare until you put your hand over the lens and see how much the contrast improves. If you have a DSLR, try using a lens hood (yes, they’re not just for show). If you don’t have one, try using your hand to shield the lens from the light the way Hillary Clinton is doing in the picture below
Hillary Clinton, either measuring her own height with her hand or showing us how to improve image quality by shielding your optics from flare. Photo’s not mine of course. Credit goes to the intornets


4.) Increase your depth of field: (warning possibly confusing analogy ahead) I’d like to think of depth of field as an imaginary wall that runs perpendicularly to the lens of your camera. Everything outside this imaginary wall would be blurred and everything inside it would be sharp. If the wall is thick, your depth of field is deep; If it’s thin, your depth of field is shallow. I’m not sure if I was successful in my attempt to make your brain explode but I tried my best. For the sake of simplicity, let’s just say that it’s the blurriness or sharpness of the background.  A shallow depth of field (blurred background/foreground) looks good for portraits but if you’re travelling you'd probably want the place to be in the spotlight as well as the people so you’d want everything to be as sharp as possible. You can adjust the depth of field by adjusting the aperture and also by “zooming in”. Use a smaller aperture (The higher the number, the smaller the aperture) to increase the depth of field. Try to set your aperture to f11 or higher and adjust the other settings accordingly. If you have a point and shoot, just set it to landscape mode.

While this is not exactly a snapshot, it’s a fine example of why you’d want a photo with a deep depth of field. You can see how focused everything is from the rocks in the foreground to the farthest ripple in the ocean. Equipment: Sigma 24-70mm f2.8, one 580ex off-camera. Settings: 1/250, f13, ISO 100

Wednesday, February 27, 2013

Biak na Bato National Park, Bulacan


Compared to my previous hike, this one was a walk in the park. Like, literally. Our destination for the day was the Biak nabato national park , a 2117 hectare protected site in San Miguel Bulacan. The place is of significant historical value as it was once the headquarters of Emilio Aguinaldo and the katipuneros.


I decided to bring my car, Xander, again this time. Tip: If you can fit enough people who are willing to share fuel expenses, traveling via a private car is usually cheaper and a lot more convenient than taking public transportation, even if your car happens to be a guzzler. 


Xander's bottom scraped along a stretch of road that was under construction. He survived the trip unscathed though

I met Fredda, nancy and two new travelbuddies, Sarah and Christian, at Sm north. We departed for San Miguel, Bulacan at around 8:30am. Continuing the trend of underestimating the distance and the difficulty of my trips, I expected this to be a shorter drive than my last trip to rizal/quezon. It turned out to be almost twice as long (3.5hours). To be fair, the drive wasn’t without its share of obstacles and they were some of the strangest road obstacles that I’ve encountered so far as a city driver. Water buffaloes almost as tall as a grown man, herds of cows walking casually in the middle of the road and, least amusing, tricycles that travel very casually at a maximum speed of 15kph on a 2 lane highway. They’re pretty common in the towns leading up to San Miguel. If you’re stuck in slow moving traffic, try overtaking and there’s a good chance that you’d find a tricycle holding back traffic for few car lengths.


A family of water buffaloes. The patriarch never took his eyes off us

We got to the park at around lunchtime. My initial thought when we entered the park was “We’re not gonna be roughing it today”. There was a proper parking lot, restrooms and stores that sell food and memorabilia. They were all near the entrance of the park though. There were no such conveniences along the trail. We got a tour guide for 300 pesos and proceeded to explore.


According to the guide, a tourist once drowned here. The body was recovered 30 feet underwater

We had lunch near one of the caves, surrounded by Coral rocks and flanked by flowing water. It was quite a scenic place to have lunch in. We got the occasional whiff of bat poop but that didn’t deter me from enjoying my food and the sights. 

We had crackers, tuna, fruits and veggies for lunch.

For the majority of the trail, the rails, the cemented roads and the relatively large number of tourists constantly hinted that you’re not in untamed land and the civilization was just nearby. As we hiked deeper into the park and approached the caves though, the rails disappeared, the concrete walkways turned into irregularly shaped boulders and the crowds got thinner and thinner until we got to our final cave where it was just us in total darkness –if it weren’t for our flashlights, that is. A word of warning: stalactites are usually not very friendly to heads that come into contact with them so always avoid contact. If you have squeamish travelmates, I would suggest not alerting them to the presence of the critters that inhabit the cave if you see them (spiders, frogs, lizards) as this will probably increase the incidence of noggin to stalactite contact in your trip.


Very tiny frogs

The caves were of course the highlight of the trip. Even if their historical value were to be ignored, they’d be majestic in their own right. There were a number of them in the park but we only got to explore 3 as ours was just a day trip. One interesting thing that we did was turn off our lights for a few seconds and listen to the sounds within the cave.


This cave was the "reception area" and meeting place for the Katipuneros during the Philippine revolution. Guerillas also sought refuge here during world war II 

We had dinner outside the park at a restaurant called “Rockwood”. In terms of ambiance, it was one of the nicest restaurants in the area. We probably came at a bad time though because ordering food wasn’t as much a matter of what you wanted to eat as it was a matter of what was available. It took us a couple of tries before we ordered something that was actually available. Food was good but nothing to write home about.


Dinner at Rockwood. 

In closing, I enjoyed the trip but I wouldn’t recommend the Biak na Bato National park to seasoned hikers because it isn’t as immaculate as they’d probably want it to be and the trail’s long but not not that difficult. I’d recommend it to first time cavers though.


The Biak na Bato National Park isn’t the kind of place that I can imagine myself visiting over and over again but I’m glad that I visited it at least once. It’s a nice little addition to the list of places that I’ve visited in my attempt to be a more outdoorsy person.

Damage: Fuel: 300 pesos per head, tour guide 300 pesos (60 per head), dinner:120 per head


If a car reviewer were to review this cave, he'd probably say something like "legroom is quite plentiful but headroom is very limited, Visibility is very poor, the seats are not very comfortable and where are the cupholders"


Wednesday, February 6, 2013

Tinipak river

We had the place entirely to ourselves. Just me, Julie, Fredda, Nancy and a tour guide. I was somewhere in Quezon surrounded by mountains of marble, crystal-clear water, lush vegetation and 3 beautiful ladies. It’s a hard life but someone has to live it.
With my travelmates, Julie, Fredda and Nancy.

More than 90% of the trail involved walking through level ground. The difficulty hiked up significantly near the end of the trail. There was a series of very steep and quite high inclines that couldn't have been negotiated without using all 4 limbs, unless you’re one of the locals who could probably do it bound and blindfolded with an adult goat strapped to their back. We almost turned back when saw the first steep “cliff”. I'm glad we didn't.

The white rocks are made of marble

 We didn't see any other tourists/hikers that day. The very steep inclines made it practically unreachable to amateurs but the whole trek was probably too short and unchallenging for the too advanced. You only go there if you have sufficient rock climbing skills or if you don’t know what you got yourself into and you couldn’t turn back anyway. I belong to the latter group.

scenic scene is scenic

Treks usually end up not being what I thought they’d be. I was expecting it to be an hour long trip to a place near Marikinia. That’s why I brought my gas guzzler of a car. The trip turned out to be a 100km (guesstimate) drive to the borders of Quezon. I was almost out of gas when we got there. I didn’t expect a hike so I didn’t bring water. I had to ask my good old friend, Julie, for one of her water bottles. I need to bow my head in shame now.

We parked my car Xander at this gas station and took a tricycle to the beginning of the trail

We left Manila at around 8am, got to rizal at around 10:30 or 11. The hike to the falls was between 1-2 hours long. We stayed at the falls for around 4-5 hours. We paid the guide 300 pesos (+100 tip). Lunch cost almost nothing since we, or more accurately, the girls cooked our food and we divided the cost among us. The tricycle from the town to the start of the trail cost us 50 per head and 75 per head on the way back. It was a very reasonably priced little trek.

with Fredda

Maybe I am getting used to hiking already and only on my 3rd hike. What I used to call difficult, I now call challenging. There is happiness to be had in communing with nature. I can imagine myself doing this more often

More Photos:
Photo of the Sierra Madre mountain range taken en route to Tanay, Rizal. One advantage of bringing your own vehicle is you can stop anytime you want to take photos.

I wasn't the only photography enthusiast among us. Too bad her camera fell into the water

The most hardcore among us. Julie's bag not only looked heavy, it was heavy. I actually thought that we were gonna have goat for lunch cos it seemed like she was carrying one in her bag 

If you don't mind banging your head against a few rocks and dying, you can probably swim here

Sunday, January 27, 2013

Buntot Palos Falls/Pangil River


The Pangil river

I had only gone to one hike prior to this. I was expecting it to be quite easy. A quarter of the way through the first trail and it was clear that it was not gonna be that way, at least not for a beginner like me. We had two trails that day. The first involved climbing a mountain for about 3-4hours to get to the Buntot Palos falls or the “hidden falls” of Laguna. We had to go through mud, steep inclines , rocks, very slippery rocks and even more slippery rocks. The risk of dying seemed pretty real. I was quite convinced that some of us would not be able to make it to the destination uninjured or… alive. I was just hoping that I wouldn’t be one of them. I was also hoping that my camera would not be among the casualties. 


Resting and enjoying the view. If anyone's wondering why my entire lower leg is covered in mud, that's how deep my foot sank in some of the muddier portions of the trail

We traversed the Pangil river on the 2nd part of our trek. It was relatively easier. The risk of dying seemed to be lower. That was until we had a close encounter with a poisonous snake hanging from a branch. In the end though, we all survived. I was especially thankful that my camera survived 

Buntot Palos falls: To give you an idea of the scale of this photo, those small dots that you see beside the falls are people


There’s a certain satisfaction to be had in conquering something that your body and mind tell you is unconquerable.

Not only was this my first trek, it was also the first time that I went out of metro manila without the company of a friend or anyone familiar to me. To a slightly lesser degree, it was like the first time I drove alone or the first time that I went to a mall alone. it almost feels like a stage in growing up that I missed. 


This trip was organized by trailadventours. Fee was 1900Php inclusive of lunch and transportation. If you're interested in joining one of their trips, you may check out: www.trailadventours.com


Exotic food restaurant. They served us snake, stingray and adobong baboy. 

A poisonous snake hanging from a branch


Saturday, January 26, 2013

Introduction


Hi I’m Alex.  If I had to enumerate everything about me, this would be a very long post so I’d just enumerate facts that wouldn’t put my target audience to sleep. I’m a photography enthusiast, a freethinker, happily single for almost half a year now, straight; I’m 25; I’ve been 25 for the past 5 years and will continue to be 25 until I no longer fancy myself as the Filipino incarnation of Peter Pan.


I fall under many different classifications of geek but for the sake of brevity, let’s just say that I was a very indoorsy geek until just recently., the complete opposite of Bear Grylls, the antithesis of Steve Erwin. My feet never touched soil or grass until I was an adult. I also didn’t see the sun very often.

 I’m a late bloomer of sorts. I was already in College when I first went to a mall unaccompanied. The first time that I went to Binondo, I felt like I was in a different country. And that was just a 20min train ride from my place. Embarrassingly, that was also just 3 years ago.

When I was ingradeschool (early 90’s), me and my family used to go to Matabungkay beach every summer. And then that stopped and I don’t remember travelling for leisure again until 2010 when a friend practically forced me to join 2 photography related trips. An act that I’m still very thankful for since it forced me out of my shell.

Those trips weren’t followed for more than a year. People have been asking me what made me decide to start travelling all of a sudden. I’m not really sure either but I suddenly felt like catching up to what I’ve missed. Maybe it early-onset mid life crisis. I’ve decided to make travelling a more frequent occurrence in my life, at least for the next few months. I created this blog to document my progress as well as to help those who want to get into budget travelling.  Since I believe that experiencing something without having a record of it is a waste, this will be a very photo heavy blog. My apologies to dial up users, if any of you still exist.

Join in me in my attempt to be a more outdoorsy geek. Try to suppress the urge to call me a wuss whenever my lack of outdoorsy skills become too apparent.